Monday, December 31, 2012

Making the Intuos4 work with Windows 8 and Adobe Photoshop CS5

The pain of early Windows 8 adoption continued with the realization that my Wacom Intuos4 tablet no longer appeared to be functioning properly from within Adobe Photoshop CS5.  Specifically, the pressure sensitive features on the brush no longer seemed to have an effect, and there was this annoying little "radar blip" that would form every time the pen would touch the surface of the Intuos.

A little online digging revealed this is a known issue, and apparently has something to do with the new pen tablet functionality integrated into the Win8 OS.  While Wacom works on a proper driver patch, implementing the steps below (pulled from here and here) followed by a reboot seemed to do the trick.  Note that these involve a few registry hacks, so the usual disclaimers apply about bricking your box if you step on a landmine while in the registry...

  • Create the following keys using regedit.exe
[HKEY_CURRENT_USER\Software\Policies\Microsoft\TabletPC]
"TurnOffPenFeedback"=dword:00000000
[HKEY_LOCAL_MACHINE\Software\Policies\Microsoft\TabletPC]
"TurnOffPenFeedback"=dword:00000000
  • Modify group policy (GPEdit.msc) to disable dynamic pen options
User Configurations\Administrative Templates\Windows Components\TabletPC
Cursors- Turn off pen feedback set to "Enable"
Hardware buttons - Prevent Press and Hold set to "Enable"
  • Modify the Control Panel | Pen and Touch settings
Ensure that 'Press and Hold | Right Click' is checked/enabled. Set the speed
to the longest possible setting (all the way right) and the duration to shortest setting (all the way left). Do not the disable press and hold setting, as you will get lag dragging and scrolling.
  • Modify the Control Panel | Wacom Tablet Properties settings
Ensure that under Options, the Side Switch Mode is set to Hover Click.
  • Modify the following keys using regedit.exe
[HKEY_CURRENT_USER\Control Panel\Cursors]
Modify the key ContactVisualisation from 1 to 0
Modify the key GestureVisualisation from 1F (31) to 0

After applying the steps above, the tablet now appears to be behaving properly...

Thursday, December 27, 2012

Building a new workbench

The old workbench in my shop has served me well over the years, but ultimately was not what I needed to meet the needs of my upcoming 2013 project list.  A quick trip to Home Depot and I had all the parts I needed for a replacement.

  • 1 - 4x8 sheet of red oak plywood
  • 5 - 2x4s
I used some 2 1/2 exterior decking screws leftover from a previous project to hold things together, as well as recycled some casters to make the base mobile.  A few hours later, everything was cut/prepped/assembled.


At the moment, the desktop surface is just sitting on the legs;  I'll need to make another quick run to depot to get a few small 90 degree brackets to permanently attach it.

Wednesday, December 26, 2012

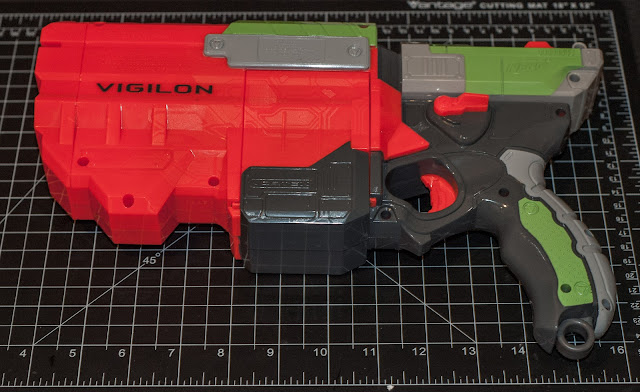
Repairing a NERF Vigilon

Santa brought the kids some NERF disc launchers for Christmas, and it appears that we received one made by one of his less competent elves.  The outside appearance was fine, however the trigger wouldn't budge.  We went through the steps in the instructions to clear a jam (although nothing was in there to be jammed, it was a new toy), but it ultimately had no effect.


After going through the normal set of engineering diagnosis steps (tapping the gun against the palm of my hand, pounding it on the floor, cursing, etc.), I decided to disassemble it and see if a repair was possible.  Once the outer shell was removed, it was fairly apparent that something was blocking the trigger mechanism.


I have no idea what the underlying problem was, but suspect that the assembly was missing some springs that were meant to keep the tabs in a lowered position.  I had no confidence that I'd be able to reassemble the internal shooting assembly if I took that apart (odds are that some little plastic part would break), so I instead decided to remove the offending plastic cylinders with a hacksaw.


After the tabs were removed, the trigger moved normally.  I reassembled the NERF disc launcher and everything appears to be work properly now.

Sunday, November 18, 2012

Replacing a DVR Hard Drive

Every few years the DirecTV/TIVO unit driving the family room television decides own its own that it has recorded enough programming and deserves retirement.  It starts by spontaneously rebooting itself every few days, and near the end, reboots numerous times on a daily basis.  I know I should replace the DVR with a new HD unit, but I just can't justify the added expense (HD upcharges, DVR cost, etc) based on the quality of garbage on television these days;   Also, this unit has served me so well for so long that, well, its just hard to part with.


Over the last decade, this scenario has happened a few times, and I've found the replacement parts from weaknees.com to be reliable and reasonably priced.  The instructions included are simple to follow, and swapping out a hard drive could not be easier.  I also elected to replace the case fan, as the accumulated dust just refused to be cleaned any further.


As can be seen above, quite a bit of dust has settled on the system boards as well.  Its quite a mess, but nothing the mighty DATAVAC Electric Duster can't handle.  After a few seconds of air blasting the box, its as good as new.


Since its been a number of years since I last replaced the drive, SATA has taken over the market and retired the old IDE-spec drives.  Weaknees.com now ships a SATA drive replacement unit, as well as a small converter board to keep the old TIVO happy.


After reconnecting the new drive and reassembling the case, the new drive is fully functional and TIVO is back to normal.  I thought about taking the time to image the new drive before connecting it (with the thought that if the drive fails again, I can just burn an image to a drive purchased from Amazon.com and save a few bucks) but in the end decided the effort just wasn't worth the time.

Sunday, November 4, 2012

Driving a simple speaker with an Arduino

Not that there was much to the project, but in efforts to bring some basic audio skills into my toolbox, an 8ohm speaker was purchased and hooked up to an Arduino Rev3 via a 100ohm resistor.  The parts are listed below:

[Mouser 253-CE405-RO] Kobitone 8ohm 1.57" Speaker
[Mouser 291-100-RC] Xicon 100ohm Carbon Film Resistors

Two 22AWG wires were soldered onto the speaker, making it ready for use.


The code used to drive the speaker is fairly simple as well; Here are links to the original material I used as reference:

Arduino Tone
Arduino Play Melody

Monday, October 29, 2012

Keurig B70 Disassembly

Thanks to Hurricane Sandy shutting down Northern Virginia, I had some time this morning to jump into a project that has been waiting for attention for close to two months. 

After almost 7 years of faithful service, my Keurig B70 coffee machine decided to call it quits.  I ordered a replacement unit, and put the old one on a shelf for later investigation.  I initially thought that maybe I could repair it and keep it is a backup, but those notions quickly disappeared after the equipment breakdown started.


There are not a lot of visible screws on the unit; There are a few on the bottom, so that is where I started disassembly.  With no idea how things were put together, I stuck to the "find a screw, remove a screw" process.


About 20 minutes into the process, I gave up on the idea of servicing the B70.  I now understand why Keurig does not have service centers and/or recommended repair shops - these things are clearly not meant to be disassembled.  With that change in mindset, things got a bit easier, as breaking parts was no longer a concern, and keeping track of which screws went with which parts also did not matter.  As with most products, there are a bazillion screws, and very few have the exact same size and/or threading.  Here is the pile of screws from when all was said and done:


My primary focus was now to find the brains, as well as the pumps, for the B70 - just curiosity more than anything.  While breaking things apart, I was expecting to see a lot of calcium or other deposits in the water lines, clogging things up and leading to unit failure.  However, I in fact found almost none.  It would appear the pump just quit due to age/use.


After a little more struggle, I found and pulled the circuit board as well as the screen.  I was a bit surprised that the screen was just a dot matrix array, I would have thought for their manufacturing runs that they would have had a custom part made.  Another surprise was the quality of soldering on the boards - the one board looked hand soldered (joints were too sloppy for a machine).  I know I jumped on the K-Cup wagon before most and had an early unit, but I was really surprised over this...


All things considered, it was a fairly interesting breakdown.  I'll save the boards and research them further in the future as time allows.

Thursday, September 13, 2012

Testing a 38KHz IR Sensor

Thanks to the tutorial on the AdaFruit Learning System, testing a new 38KHz IR sensor was a 5 minute exercise.  The parts used for this test were:
  • 1 x TSOP38238 38KHz IR Sensor [AdaFruit-157]
  • 1 x T 1 3/4 Blue LED [Mouser 604-WP7113QBC/G]
  • 1 x 220ohm 1/4 watt resistor [Mouser 291-220-RC]
and were connected as follows:


In order to test the sensor, an LED was connected between Vcc and the Vout pin (via a current limiting resistor).  If the IR sensor detects a 38KHz modulated pulse wave (PWM), it pulls the Vout pin low, thereby completing the circuit and lighting the LED.
 

After powering the circuit, the closest TV remote control was used to test the sensor.


Sunday, September 2, 2012

Using the RHT03 temperature and humidity sensor

Continuing along with temperature observation weekend, today an RHT03 temperature and humidity sensor was interfaced to an Arduino.  As far as I can tell, the RHT03 sensor also goes by the name DHT22.  A number of articles are already online on this device; The best review I found was on Hacker Reviews, with the best set of documentation located here at AdaFruit.

Using the code library provided from AdaFruit, the sensor was hooked up and running within 30 minutes.  Instead of using the serial monitor, I piped the output to my LCD panel, and all appeared well on the first run.

First impressions are good - the temperature reading is very stable compared to the TMP36 (but as 5x the cost, I'd expect that), and the humidity sensor agrees with another reader I have on hand.  The footprint of the device is quite large compared to the TMP36, and the code baseline is a little larger to get comms going, but if you need something a bit more accurate, it appears this component is the answer.  See below for pictures of the implementation...


Saturday, September 1, 2012

Using Analog Devices TMP36 Temperature Sensor

In order to get some interesting data to display on the LCD panel, a TMP36 temperature sensor was purchased.  A tutorial on AdaFruit was followed for this exercise, and I found it to be quite thorough and well written.

Before connecting the TMP36 to the Arduino, an initial test was performed on the sensor.  It was connected to +5V and GND, and using a multimeter, the Vout pin was read and gave a result in the expected range for my lab which is in desperate need of a little more air conditioning.  Placing a finger on the TMP36, the reading was seen to go up, and putting a soda can against the sensor was also observed to make the reading go down.


The next step was connecting the TMP36 to analog pin 0 on the Arduino.  A quick sketch later, and the LCD panel was reading the rooms ambient temperature.  Unfortunately, the readings (even taken every few seconds) were fairly erratic (values of +/- 8 degrees were observed).  After a bit more reading and investigation, this would seem to be due to noise on the +5V line.


In efforts to get a better reading, the TMP36 was moved from +5V power to +3.3V power, and the AREF pin on the Arduino was used to adjust the analog pin readings.  That calmed the reading jitter down a little (but it was still a bit too unstable for my tastes), and as an unfortunate side-effect, the values started reporting the room temperature to be a bit too high.  Going back to the multimeter, I discovered that my +3.3V line was actually closer to +3.2V.  Adjusting the math in the sketch to account for this voltage difference put the room temperature within expected limits.


Going back to the TMP36 datasheet, the vendor recommended putting a .1uF ceramic capacitor with short leads onto the positive pin of the sensor.  Unfortunately, I did not have one of those laying around, but did have a 100uF 100V capacitor that I plugged in to the circuit (a bit of overkill, but when its all that was available...).  That immediately calmed the readings down to fluctuate between the expected +/- 1 degree.


That is about as far as I plan to take this circuit for the moment.  I have a DHT22 temperature and humidity sensor I'll try out first, before deciding whether its worth my time to go back and write some temperature averaging code to clean up the LCD display.

Thursday, August 30, 2012

Creating a GitHub Library for Downloads

Since blogspot does not support uploading files, Spare Time Notebook needed to find an alternate location for dumping non-image files on the internet.  Since some of these files over time will most likely be source code (Java / Arduino / etc), the decision was made to create an open source project on GitHub.


The location for the new repository is:
https://github.com/sparetimenotebook/sparetimenotebook

The first file posted was a zip file containing the project contents from June/July series:

Building an Arduino LCD Interface
http://sparetimenotebook.blogspot.com/2012/06/building-arduino-lcd-interface-part-i.html

and can be located in the downloads:
https://github.com/sparetimenotebook/sparetimenotebook/downloads/sparetimenotebook-lcdpanel-v1.zip

Monday, August 27, 2012

Reconfiguring the WD Sentinel DX4000 to use a Fixed IP Address

Like all new devices on the network, the WD Sentinel decided to be grumpy about a few things, its DCHP lease being one of them.  Every 12 hours or so, I observed the following in the server logs:


With the details from Event Viewer being consistently along the lines of:


or


After a bit of research, I stumbled across the following issue thread on the Netgear forums.  It appears that the WNDR4000 (the network device hosting the WD Sentinel) has a known issue with DHCP renewals - well, at least known to the user community, it would appear based on the age of this thread that Netgear has chosen not to fix this problem.

In attempts to bypass the problem, the WD Sentinel DX4000 was reconfigured from DHCP to a static IP address, per a discussion thread found on the Western Digital forums which led to the following set of directions from the vendor.  The update was a fairly standard TCP/IP configuration change for Windows (the DX4000 host OS), although WD uses an interesting NIC "team configuration" which I was unfamiliar with.  After following the directions and rebooting the device, it came up fine with its new static IP address.  I'll monitor the drive over the next few days and verify that this removes the network warnings from the system Event Viewer, but fairly certain this should solve the problem.

Saturday, August 11, 2012

CD Spring Cleaning... in August

With the mighty THOR (DX4000) online and hard drive space more than plentiful, I took the opportunity for a bit of belated electronic spring cleaning.  We all have that pile of software CDs that we'll probably not need again, but refuse to get rid of (because as soon as you do, you'll need them of course)...


In my case, its some old Dell drivers, peripheral support, etc.  Most likely any new reinstalls would have me downloading the newest versions, but nonetheless, I have trouble parting with originals.  So, to solve this problem, I made ISO backups of the CDs, and tossed the physical media.

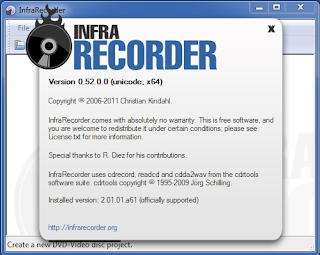
Having Windows 7 on my primary workstation (and being too lazy to walk to the Linux box), I needed to find something to copy the CDs to an image.  A few Google queries later, I was installing the most recent version of Infrarecorder.


The interface is fairly idiot-proof, and building the backups could not have been easier.


An hour later, all the CDs were stored on the DX4000, and my desk was feeling a bit cleaner.

Sunday, July 29, 2012

WD Sentinel DX4000 12TB Backup Plan

Over the years I've learned the lesson (the hard way) that data without a backup has a funny way of being lost - call it Murphy's Law as applied to storage - any files that can go wrong, will go wrong, and usually at the most inopportune time.

To that end, with 12TB of new storage on the network (WD Sentinel DX4000), I needed to get an automated backup plan in place; One of the other things I've learned over the years is that when it comes to backups, I'm lazy - if I don't automate, I don't backup.

Fortunately, data storage has never been cheaper (one could argue that sentence applies in more ways than one).  I ordered a Western Digital My Book Essential 3TB through Amazon.com to be the primary backup location for the most critical data on the network.  There were a number of similar products on the market, but this one was chosen primarily for 1) cost and size, and 2) the hope that perhaps two products from the same vendor will coexist better than others.  Since the DX4000 has two USB ports available on its case, connecting the device was easy.


To perform the actual backups, software was needed.  The DX4000 ships with a product which (for a fee of course) will backup data to the internet.  However, with a few TB in play, that solution would be too time consuming/costly.  Since the DX4000 is running Windows Storage Server, its possible to use a Remote Desktop Connection to log into the box.  Doing that, I installed a copy of Cobian Backup (v11 Gravity) on the DX4000, a backup package I've used for a number of years without issue.  It has a small installation footprint, and is easily configured to do full backups.

A number of Cobian scheduled tasks later, the DX4000 was setup for nightly backups of critical data directories - all for about $150 and about 1 hour of time.

Saturday, July 28, 2012

Windows 7 Explorer Bug

While rebuilding the network shares at Spare Time Notebook (thanks to the newly provisioned 12TB WD DX4000), I've decided to take the time to pull out a broom and sweep up 10 years worth of file server accretion. 

While the rearranging the furniture, I've found myself repeatedly seeing the following error (although never being able to nail down its exact cause, as it seems to manifest in slightly different ways, and with a few variations of complaints):


Since I'm quite certain the folder is not open in another program (and went through the usual set of 101 procedures to resolve the issue), it seemed there was something else going on.

After a few queries to the all knowing Google, it seems this behavior is due to a bug in the Windows 7 Explorer that has never been patched (not sure if Redmond has the college interns supporting Explorer these days or what, I find it hard to believe something like this would be ignored).  The best discussion I've found on this topic is found here, where the problem and a few workarounds are provided.

My workaround preference (without changing any global OS and/or folder properties) is as follows:
  • After receiving one of the usual suspect error windows, I cancel out of the dialog
  • Take Explorer out of Details view and put it into Content view
  • Attempt to Move/Delete/etc. the directory again - this time, all will be well
Hopefully this will be resolved in Windows 8, but I'm not holding my breath...

Monday, July 23, 2012

WD Sentinel DX4000 12TB

At Spare Time Notebook, we treat computer hardware like we treat our cars - we buy the biggest/best we can at the time, and then run them until they fall apart.  To that end, the old Windows 2003 Server built circa 2004 was fast approaching retirement.  With 2TB of RAID5 storage, it served admirably over its years, but as of late, was really starting to show its age.

While investigating a replacement, I ran through a number of options:
  • building a full replacement server
  • building a NAS
  • purchasing a NAS off the shelf
All of which had pluses and minuses, but a large factor in my decision was time spent vs. cost saved.  In many cases, with the home grown server/NAS options, I just wasn't going to save enough time to justify the limited cost savings.  Combine that with a number of good NAS options off the shelf, and the decision practically made itself.

The new drive selected was the Western Digital Sentinel DX4000 12TB.  For its cost point, it had the best options available and would fit seamlessly into my existing network (since unlike many options, the DX4000 runs Windows Storage Server vice an embedded flavor of Linux).  With four 3TB drives, it will result in just about 9TB of storage (effectively losing a to RAID5 parity).

When the device arrived, I was pleasantly surprised by the "heft factor" - the DX4000 has some weight behind it (a surprising ratio of metal to plastic in its construction).  It feels sturdy, and with its black finish, really looks the part of an office-oriented NAS.

The pictures below show the device next to a CyberPower 1000VA UPS.  With the new setup, I'm hoping for years of uninterrupted storage service.


Saturday, July 7, 2012

Arduino Character LCD Custom Characters

With a character LCD panel interface constructed and connected to the Arduino, I spent some time getting familiar with the API.  I reviewed the Arduino Liquid Crystal Library Documentation, as well as spent some quality time with Google reviewing sample code.

Since one of the next sensors I'd like to experiment with reads ambient temperature values, I decided to build a custom character to display the symbol for degrees (yes, I realize there may have been a built-in character on the panel to get the job done, but my effort here was for learning, not for finding the optimal solution).  I found the following site which had a convenient 5x8 character conversion tool (HD44780 LCD User-Defined Graphics), and it really made the process easy:


With the character values in hand, I modified the HelloWorld sample file to create the character and display it on the LCD.  Most of of the code references I reviewed online used the 'byte' datatype for working with the custom character.  I found when using this, I got compilation errors for ambiguous method references.  Based on the errors from the IDE, I modified the code to use uint8_t, and that seemed to clear up the compilers complaints.  The final code is seen below.


#include <liquidcrystal.h>

LiquidCrystal lcd(6,7,8,9,10,11);

uint8_t degrees[8] =
{
  B01100,
  B10010,
  B10010,
  B01100,
  B00000,
  B00000,
  B00000,
  B00000
};

void setup()
{
  lcd.createChar(0, degrees);
  lcd.begin(20, 4);

  lcd.print("sparetimenotebook");
  lcd.setCursor(0, 1);
  lcd.print("temperature = 72");
  lcd.write((uint8_t)0);
}

void loop()
{
  lcd.setCursor(0, 2);
  lcd.print(millis()/1000);
}

After uploading the code to the Arduino, everything ran as expected.  The LCD panel is now ready to go for future projects...


Friday, July 6, 2012

Windows 8 Keyboard Shortcuts

I haven't had much time to work with the Windows 8 Preview VM (documented here), but thanks to Patrick Norton and the folks at Tekzilla in Episode 337 for highlighting a few common shortcuts:

WindowsBring up the metro desktop
Windows + CBring up the charms menu
Windows + DBring up the legacy desktop
Windows + IBring up the settings menu

Sunday, July 1, 2012

Building an Arduino LCD Interface, Part V

This is the final installment of the Arduino LCD Panel interface project.  To complete the project, I soldered the following parts onto the PCB:

[Pololu 967] 0.100" (2.54 mm) Breakaway Male Header: 1x40-Pin, Right Angle
[Pololu 1031] 0.100" (2.54 mm) Female Header: 1x16-Pin, Straight
[Mouser 652-3386F-1-103TLF] Trimmer Resistors - Through Hole 3/8" 10Kohms 10% 0.5W

In hindsight, I should not have used the right angle male headers for the wire connectors on the top of the board.  Once the wires are connected, it puts strain on the 16 pin LCD connector at the bottom of the board.  For the next iteration, I'll instead use vertical straight pin headers:

[Pololu 1012] 0.100" (2.54 mm) Female Header: 1x2-Pin, Straight
[Pololu 1014] 0.100" (2.54 mm) Female Header: 1x4-Pin, Straight

The power/control/data wires I made using solid core 22GA wire.  As it turns out (no big surprise here), the wires are not all that flexible.  I ordered a few pre-crimped wires (not solid core) and connectors; they should arrive later this week:

[Pololu 1820] Wires with Pre-crimped Terminals 10-Pack M-F 6" Black
    [1822 = Red, etc., etc.]
[Pololu 1901] 0.1" (2.54mm) Crimp Connector Housing: 1x2-Pin
[Pololu 1903] 0.1" (2.54mm) Crimp Connector Housing: 1x4-Pin


To mount the panel to my breadboard, I put the LCD up on 3/4 inch standoffs.  The following Mouser parts were used:

[761-2061-256-AL-7] PCB 3/4 LGNTH 2-56 STD FML HEX STANDOFF
[534-3368] Mounting Hardware WSHR FIBER#4 .250"OD
[534-9457] Mounting Hardware 3/4 2-56 STEEL BND Screws 

The 3/4 inch screws were a bit long (1/4 inch would have been plenty), so I just used some cutters to shorten them a bit - not ideal, but better than waiting a week for new screws to arrive.

Overall, I'm pleased with the outcome.  This PCB will allow the LCD panel to be "ready to go" for various prototyping purposes, but easy to disconnect from the Arduino when its not needed, without leaving a mess of wires all over the breadboard.  For the next revision, I'd definitely switch the right angle male headers for vertical female headers, as well as shortening the board a bit (so the trimmer is closer to the LCD panel itself).

Friday, June 29, 2012

Building an Arduino LCD Interface, Part IV

The PCB arrived today from Sunstone Circuits:


I hope to find time to solder the parts on soon...

Monday, June 25, 2012

Installing new wall outlets

No matter how much I plan in advance, I never wind up with outlets where I need them (either high or low voltage).  In this case, the workshop desk has plenty of outlets above the desktop, but none where I needed them below.


As luck would have it (and this rarely happens to me), the desk happens to be located against an unfinished closet -- jackpot, minimum drywall damage required!   After locating the desired position for the outlets (and throwing up some scrap lumber to get things where they need to be), I marked the wall and cut out holes for two single gang boxes.


A few holes drilled into the 2x4s to route cables, and I was ready for final connections and face plates.  A great project for the weekend, and now I have power and CAT5 connections right where I need them.