Sunday, November 18, 2012

Replacing a DVR Hard Drive

Every few years the DirecTV/TIVO unit driving the family room television decides own its own that it has recorded enough programming and deserves retirement.  It starts by spontaneously rebooting itself every few days, and near the end, reboots numerous times on a daily basis.  I know I should replace the DVR with a new HD unit, but I just can't justify the added expense (HD upcharges, DVR cost, etc) based on the quality of garbage on television these days;   Also, this unit has served me so well for so long that, well, its just hard to part with.


Over the last decade, this scenario has happened a few times, and I've found the replacement parts from weaknees.com to be reliable and reasonably priced.  The instructions included are simple to follow, and swapping out a hard drive could not be easier.  I also elected to replace the case fan, as the accumulated dust just refused to be cleaned any further.


As can be seen above, quite a bit of dust has settled on the system boards as well.  Its quite a mess, but nothing the mighty DATAVAC Electric Duster can't handle.  After a few seconds of air blasting the box, its as good as new.


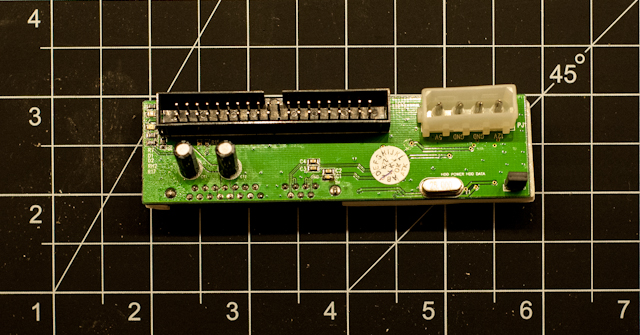
Since its been a number of years since I last replaced the drive, SATA has taken over the market and retired the old IDE-spec drives.  Weaknees.com now ships a SATA drive replacement unit, as well as a small converter board to keep the old TIVO happy.


After reconnecting the new drive and reassembling the case, the new drive is fully functional and TIVO is back to normal.  I thought about taking the time to image the new drive before connecting it (with the thought that if the drive fails again, I can just burn an image to a drive purchased from Amazon.com and save a few bucks) but in the end decided the effort just wasn't worth the time.

Sunday, November 4, 2012

Driving a simple speaker with an Arduino

Not that there was much to the project, but in efforts to bring some basic audio skills into my toolbox, an 8ohm speaker was purchased and hooked up to an Arduino Rev3 via a 100ohm resistor.  The parts are listed below:

[Mouser 253-CE405-RO] Kobitone 8ohm 1.57" Speaker
[Mouser 291-100-RC] Xicon 100ohm Carbon Film Resistors

Two 22AWG wires were soldered onto the speaker, making it ready for use.


The code used to drive the speaker is fairly simple as well; Here are links to the original material I used as reference:

Arduino Tone
Arduino Play Melody