Tuesday, March 14, 2017

Installing Bash on Windows 10

The Windows Linux Subsystem (WSL) is now available for beta on Windows 10.  Installing it was fairly simple, and included two obligatory reboots.

Start in the Settings app, and open the "For developers settings":


Click the "Developer mode" radio button, and answer "Yes":


After a bit, a prompt will tell you its time to reboot:


After the reboot is finished, use "Programs and Features" to enable WSL:


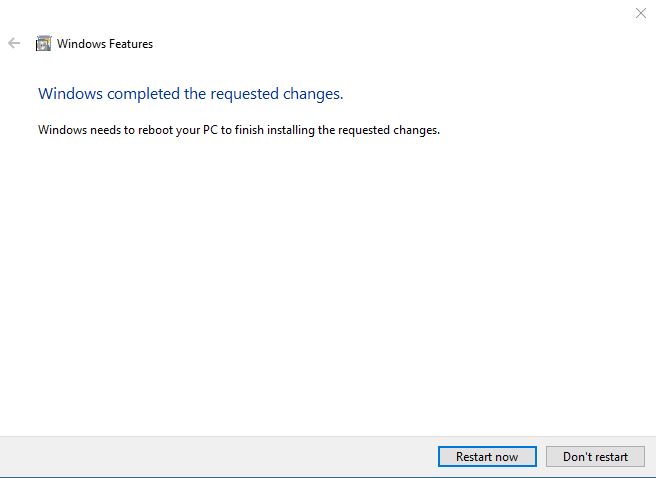
After a bit, a prompt will tell you its time to reboot (again):


After the reboot is finished, use the start menu to launch "Bash on Ubuntu on Windows" (you will be prompted to accept a license agreement and provide a username/password to create a Linux-based user account):


After a bit more grinding, the installation is complete.  Your first order of business will be to right-click | Properties for Bash and change the font to something other than the dreadful default (in my case, back to Lucida Console).


Finally, spend a few minutes to upgrade via the usual Linux commands issued in your newly installed bash console:

  • sudo apt-get update
  • sudo apt-get upgrade

Windows finally has a "real" Linux console.  Here's to hoping it makes it out of beta and gets proper care and feeding going forward...

Sunday, March 5, 2017

Cutting 2020 Aluminum Extrusion

Aluminum extrusion can used for building cages/frames for electroincs projects.  There are any number of ways to cut it (aluminum is a very soft metal), but for my money, a jigsaw with a metal cutting blade is the easiest.  The blades are inexpensive, easier to change out then a blade on a table or miter saw, and work just as well.  The material I use is:


Keeping square cuts can be a challenge, but jigs can be used to make the job easier.


Once the material is cut to length, it can be assembled with corner connectors or brackets.  The center of 2020 aluminum extrusion can be tapped to accept a 6mm screw using the materials below:


Cutting 12 sections of aluminum extrusion will allow you to assemble a cube suitable for a 3D Printer...


Saturday, February 4, 2017

Filename too long

While recovering data from an old NAS, I encounter a folder that would not delete after being restored on a USB Drive.  The error Windows was throwing was:

The filename would be too long for the destination folder.   You can shorten the file name and try again...

After a bit of research, the following workaround was used to successfully delete the folder.

  • open a command prompt
  • cd into the nested directory folder (i went about half way down)
  • subst m: .
  • j:
  • rmdir /s remaining_folder_name
  • c:
  • subst /d m:
This effectively assigns part of the large nested directory folder to the m: drive, and allows you to switch to that drive and delete the remaining nested folder.

Friday, February 3, 2017

Backup Sonos Playlists

As great as the Sonos system is, it has one major shortcoming - there is no way to backup your playlists.  Why this is, I have no idea - I can think of absolutely no reason why you would not want to provide this kind of basic functionality. Luckily, someone has created a workaround for this.  Listed below are the basic steps on setting up a Mac running OS X to run the spl utility.

First, add some utilities:

  • sudo easy_install pip
  • sudo pip install soco

Then pull the spl master from GitHub, located at the following location:

Once installed you can run playlist backups with either of the following commands
  • ./spl.py -x MYPLAYLIST
    • this will export a specific playlist
  • ./spl.py -X
    • this will export all playlists

The utility exports XML files (one per playlist), with each track listed by name along with its associated location.

Wednesday, February 1, 2017

Synology DS716+II NAS File Transfer Slowness from Windows 10

With the Synology DS716+II NAS fully set up for link aggregation (a 2Gbps pipe to the home network), I was expecting great things for my first file transfer.  I used a single album music folder (mp4 files, about a dozen songs) as a test upload, and dragged/dropped it onto the network share, then waited... and waited some more - it was horrendous.  After 5 minutes, I cancelled the copy and began my usual ritual of cursing technology and every IT commercial vendor that came to mind. Per the Windows file transfer window, I was getting just around a 150Kb/s transfer rate.

The Synology Knowledge Base was fairly useless, and basically instructed you to make sure that your device was plugged in and you were not running any software which would consume CPU on your NAS.

I am not a network engineer by trade, but have played around with it enough to know that its just as much black magic and voodoo as it is science.  There are so many variables in play and parts that can go wrong, that its always a time consuming effort to track a problem to ground, and this was no exception.  I spent a number of hours working different combinations of switch settings (with/without link aggregation, MTU sizing, etc, etc), swapping out cables, rebooting devices, and if had a goat in my possession, the poor fella would have been sacrificed as well in attempts to appease the network gods.

Ultimately, the problem was traced to Windows 10.

Your mileage may vary, but for my network and workstation configuration, this configuration completely resolved my issue and pushed my transfer speeds from 100 Kb/s up to the neighborhood of 90 MB/s.

Control Panel | Network and Sharing Center | Change Adapter Settings | Ethernet (or your NIC here), then click Properties:


Then click Configure...:


Then switch to the Advanced tab:


Change Speed & Duplex from "auto negotiation" to "1.0 Gbps Full Duplex".  This instantly fixed my transfer speed issue (not even a reboot required).  The new transfer speeds can be seen below, and are much more in line with what I was expecting from a modern NAS.


Synology DS716+II NAS using Link Aggregation

With the new Synology NAS set up and running with a default configuration, it was time to move on to a bit of customization.
First up was to address the networking.  The DS716 comes with two NICs, but with the default configuration, both are addressed separately using DHCP.  The network switch we have supports link aggregation, so that was implemented first on the switch, then on the NAS.

Mileage may vary depending on your switch, but for the Cisco SG200-26, the settings below can be used to convert two ports on the switch into a Link Aggregation Group (LAG).


On the NAS, converting to a static IP and bonding the ports was a two step process.  For step 1, using the Synology console (Control Panel | Network | Network Interface) for network management, modify the first link, unchecking DHCP and selecting your desired static IP address.  For the second step, choose the option Create | Create Bond and chose the option for IEEE 802.3ad dynamic link aggregation.  After applying, this will grind for a bit, then you should be successfully setup for a link aggregated connection (see below).


Now on the network with a 2 Gbps pipe, the NAS should have been cruising, but was actually moving at a snails pace.  The solution to this is documented in the next post.

Setup of a new Synology DS716+II NAS

After many years of good service, the Western Digital DX4000 NAS on our network decided it was ready for retirement:


Yes, this NAS has dual-NICs, and yes, both of them decided to quit on the same day.  More on that and the upcoming recovery in another post (at least the hard drives are still good)...

After a bit of research, a new NAS was selected, the Synology DS716+II:


After many years in RAID5, we are moving back to RAID1 (mirroring) using Seagate 8TB Ironwolf NAS SATA drives, with a local backup to a WD USB 8TB drive, as well as a cloud backup to Amazon (which is natively supported by the Synology).  This will help keep the drive count down (as well as cost), will be easier to recover (if the chassis fails, only one drive to recover), and the local USB plus cloud backup should be more than ample for fault tolerance.

Setup went fine, and was fairly uneventful for out-of-the-box configuration.  I will document the network configuration (link aggregation) as well as some Windows oddities in the next post.

Sunday, January 22, 2017

Disassembly of a LED sword toy

One of the kids toys stopped working, and rather than just throw it out, we spent some time taking it apart to see how it worked.  Not sure where this particular sword came from, but if memory serves, this came from an amusement park (one of those carts of gadgets they push around at night, this thing probably set us back 20 bucks).

There were only a few screws holding everything together, and after things were apart, it was easy to see the problem.  Seems one of the cheap batteries failed/leaked, and melted some of the wiring. Pulling everything out of the plastic casing, stripping a few wires and connecting it to the lab power supply (+5v), the LEDs still worked - perhaps we'll keep them and make something else out of this small kit.   The toy contained 5 LEDs, 100uF capacitor, push button, and a small PCB (powered by 3 AA batteries).

See below for pictures...


Wednesday, January 18, 2017

Building a solder fume extractor

In efforts to breathe a little easier in 2017,  a solder fume extractor was built for the workshop, using the following parts:


The plastic components were printed on a Lulzbot Mini using ABS.  The final assembly is shown below.


Raspberry Pi 3 xdrp

The following commands will install some basic packages to allow remote logins and file sharing (thanks to source):

sudo apt install -y tightvncserver
sudo apt install -y xrdp
sudo apt install -y samba

Connect via RDP, login, and enjoy the headless pi...


Monday, January 16, 2017

Raspberry Pi 3 Setup 101

In order to support a number of upcoming projects, I've finally decided to take a step outside of the old/comfortable Arduino space, and do some work with the Pi.  The most immediate use will be to get OctoPi up and running on our new Lulzbot Mini (more on that on a future post).  But before I can do that, I need to get a Pi workspace up and running.

There are a bajillion setup guides for the Pi 3, so I will not attempt to recreate one here.  Below are my notes on the basics, so that when I forget all of this and need to do it again, I only have one place to look for my answers.

HARDWARE:


A quick trip to Amazon has everything you need: board, case/power, memory card:

Raspberry Pi 3 Model B
Smraza Starter Kit
SanDisk 32GB MicroSD card

The kit went together easy, but the screws for the case were awfully small - guess I'm showing my age, but I decided to pull out the Donegan Optivisor rather than accidentally scratch the board during assembly...


OS SETUP:


After the board was assembled, it was time for prepping the SD card.  Instructions were found at the Raspberry Pi site:

Downloading and installing the Raspberry Pi Software

I skipped the NOOBS option, and downloaded Raspbian directly, and burned it to the MicroSD card using etcher.io.  All worked as expected, and the Pi booted up without issue.

Basic Pi Configuration:


After booting for the first time, some basic house-cleaning was performed.

From a terminal window:

sudo apt-get update
sudo apt-get upgrade
sudo apt-get clean

From the Raspberry Pi configuration:


Localization:
Changed everything to US/English options, and the appropriate timezone.

System:
Changed the hostname and password, as well as choosing to expand the filesystem.

Finally the Pi was rebooted and WiFi connected via the toolbar app.  After a quick browser check to ensure everything was properly connected to the internet, victory was declared.

In a future post I'll list my notes on installation of xrdp, and getting the Pi to run in a headless manner (already tired of switching my cables, would prefer to remote into the device)...

Sunday, January 1, 2017

Assembling a Lionel Covered Bridge (6-24117)

What a pain in the #!*&.  I've assembled a number of things over the years, but this one really caught me by surprise, primarily by the time and frustration factor...

The bridge in question is the Lionel 6-24117 Covered Bridge for O-scale trains.  I am not a huge "train person", but we do have one we use during the holidays with the kids.  The manual starts off claiming the kit is "easy to assemble";  That may be true if you have the hands of a child, or patience of a saint, but for the rest of us, it took a little more effort than advertised.

The assembly kit comes with 32 screws.  Really, its not the quantity that is bad, its the size and quality of the washer screws.  They are small, but not so small that a precision screwdriver can be used.  So instead, you need to dig through your toolbox and find the smallest non-precision screwdriver, and use that one with great patience.  Why patience?  Well - none of the screw holes are pre-tapped, and the screw heads strip very easily.  And fully knowing this issue, how many extra screws were included by the vendor - thats right, zero, thanks Lionel.

Your mileage may vary, but after stripping the first screw trying to assemble everything up front, this is what worked for me. Use one new screw, and pre-tap all the holes in the kit.  I did this by twisting the screw in a few turns at a time, then backing it out.  Lather-Rinse-Repeat for 32 holes in the product.  After that, follow the directions, using painters tape to keep the pieces steady while the parts are connected.

If you take your time, the kit can be assembled with good results.  See below for a few photos.


One final note: To power the lights, this 12VAC power supply was used instead of a Lionel accessory power kit.  Just cut off the female plug and solder the wires directly to the bridge leads, finishing the connection off with some heat shrink tubing.