Saturday, March 17, 2018

Root 3 CNC - Z-Axis Front Panel

Relevant official documentation can be found at: https://rootcnc.com/machines/root-3/animated-assembly

For the Z-Axis front panel support assembly, I used:

  • 2x 3D Printed Root 3 CNC Parts
  • 4x 608zz skate bearings
  • 2x M3 x 20mm screws (0.5mm threads)
  • 2x 3D Printed Custom Plugs
  • 1x T8 L350mm 8mm Lead Screw and T Nut


The custom plug is one I added to the design to compensate for loose bearings in the top and bottom cup parts.  The plug was made to snap into the bottom of the cup, to help keep the bearings from falling out.  The files for the custom plug were uploaded to Thingiverse at:

Root 3 CNC Z-Axis Bearing Cup Plug
https://www.thingiverse.com/thing:2829391


The animated video on the official site shows all the details necessary to assemble the panel.

Note that Loctite Thread Locker (Blue 242) was used to help keep the screws from shaking loose from the rivet nuts.  I also wound up using Loctite Gel Super Glue around the top bearings as well as to weld the custom plug onto the top and bottom cups.  Before using the glue, make sure to seat the lead screw so that the skate bearings are all properly aligned.


Root 3 CNC - Z-Axis Back Panel

Relevant official documentation can be found at: https://rootcnc.com/machines/root-3/animated-assembly

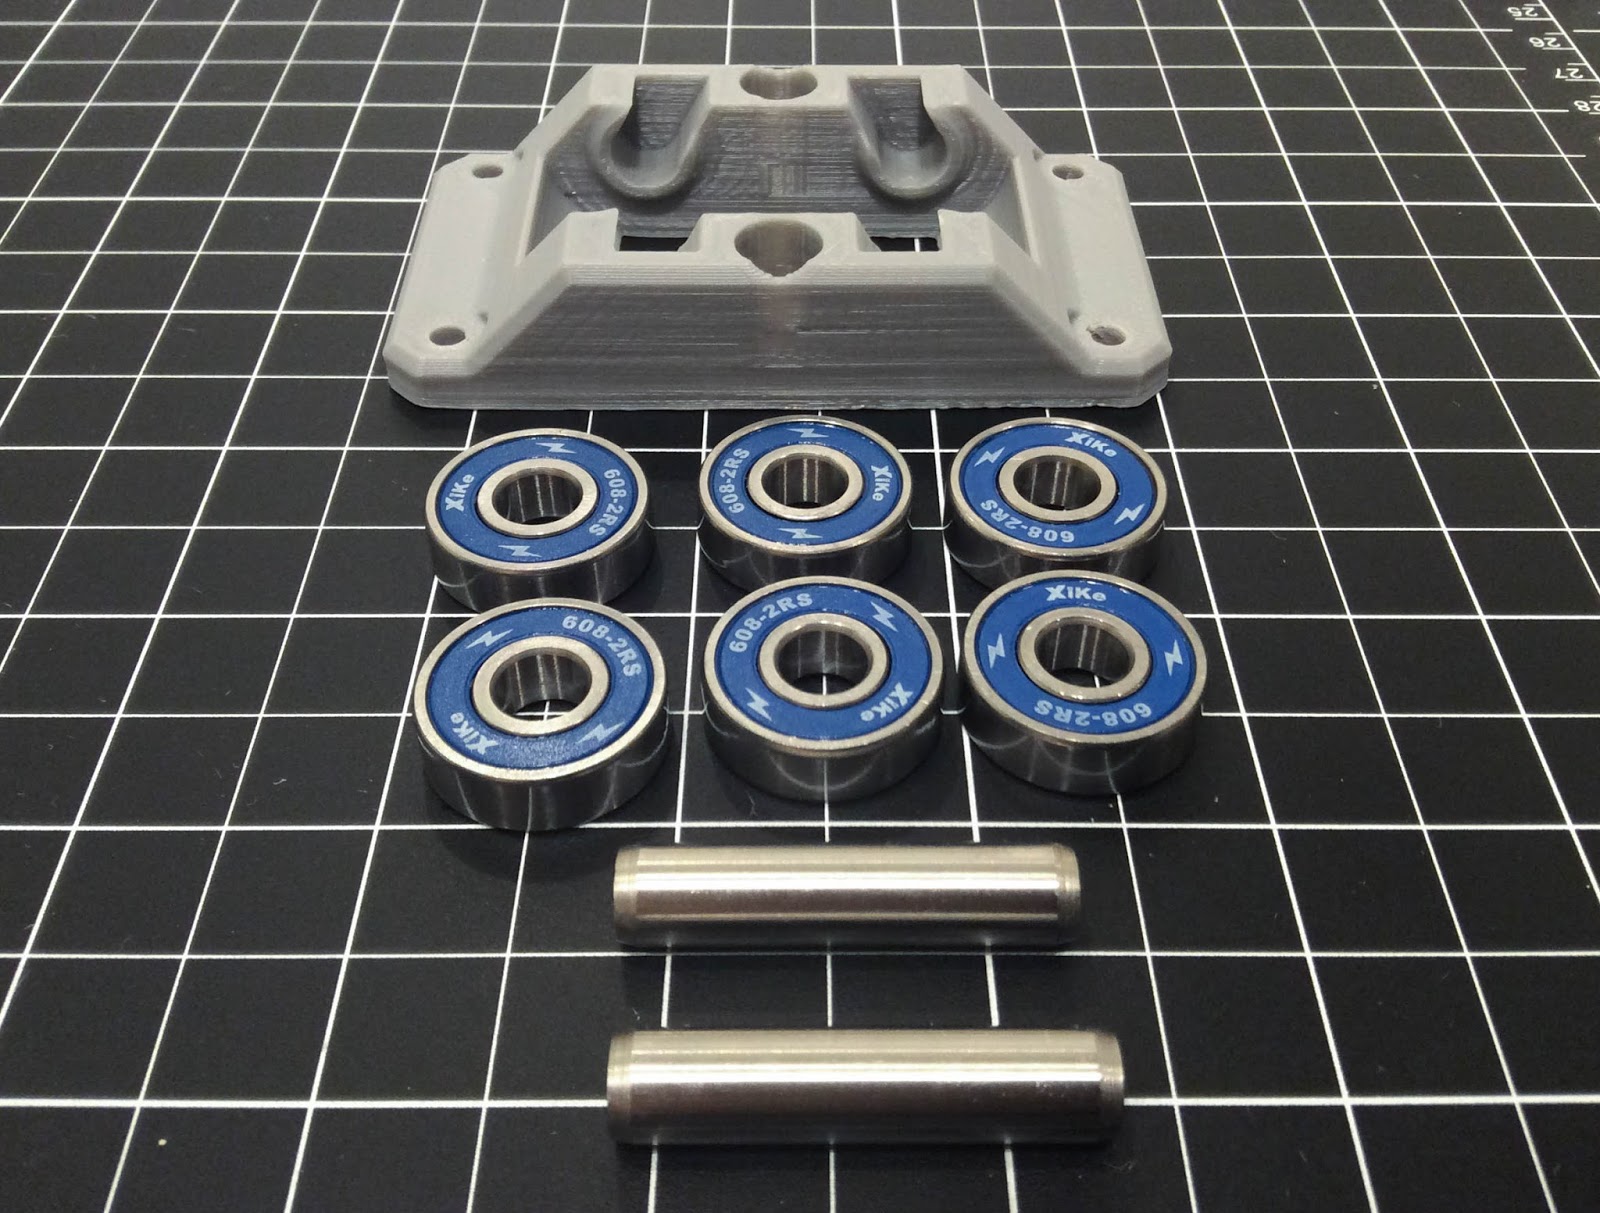
The parts used to assemble the X-Axis Carriage Belt Idler:

  • 1x 3D Printed Part
  • 6x 608zz skate bearings
  • 2x Dowel Pins, 5/16" Diameter, 1-3/8" Long


For my first iteration of this part I tried to use M8 dowel pins, and it was an unmitigated disaster.  The pins were so tight that a hammer was needed to get the bearings onto the pin, and I always destroyed at least one of the bearings during the process.  After some advice was given online, I retried the build using 5/16" diameter pins, which worked perfectly (no hammer required).  The finished idler is seen below.


The next step was to add the top motor mount to the panel using:

  • 1x 3D Printed Part
  • 5x M3 x 25mm screws (0.5mm threads)
  • 1x M3 x 20mm screw (0.5mm threads)
  • 6x M3 washers
  • 4x M3 nylon lock nuts
  • 2x M3 nuts


Loctite Thread Locker (Blue 242) was used on the captive nuts  (where using nylon lock nuts was not possible) to help keep the screws from coming loose:


To add the lower motor mount and idler to the panel, the following parts were used:

  • 1x Idler Assembly
  • 1x 3D Printed Part (motor mount)
  • 5x M3 x 30mm screws (0.5mm threads)
  • 1x M3 x 25mm screws (0.5mm threads)
  • 6x M3 washers
  • 4x M3 nylon lock nuts
  • 2x M3 nuts


The assembled piece can be seen below:


Root 3 CNC - Outsourced Parts

My goal is to build as much of the CNC on my own as possible, but some pieces I needed to outsource.

The wood panels were outsourced for time.  Measuring/cutting/drilling all of those holes would have taken quite a long time, and was prone to error.  Instead I chose to purchase ready-made parts from the Root CNC store:

Front and rear X-carriage Z plate (pre-installed rivet nuts)
https://rootcnc.com/product-category/root-3/


I also needed to outsource the X-Axis Box Section Mount, as my Lulzbot Mini just didn't have a the required surface area to print the part.  Since this part is load bearing, I was also a bit hesitant about attempting to split the part into smaller sections.  I purchased the parts through:

https://www.3dhubs.com/

and was very happy with the results.


Root 3 CNC - Box Carriages

The first parts built were the box carriages.  A number of these are needed for the machine (4 total).  Relevant official documentation can be found at:

https://rootcnc.com/machines/root-3/animated-assembly

For each half of the box carriage, I used the following:

  • 1x 3D Printed Part
  • 4x M8 x 25mm bolts (1.25mm threads)
  • 4x 608zz type bearings
  • 4x M8 nylon lock nuts
  • 8x M8 washers


Push the bolts through and add washers:


Add skate bearings:


Add another washer and a nylon lock nut:


Lather rinse repeat 8 times.

To assemble two halves into one full carriage, I used the following:

  • 2x box section subassemblies (from above)
  • 4x M8 x 75mm bolt (1.25mm threads)
  • 8x M8 nuts
  • 8x M8 lock washers
  • 4x M8 nylon lock nuts
  • 6061 Aluminum Rectangular Tube 1/8" Wall Thickness, 1" High x 1" Wide
    • length of tube will be specific to how large you are making your cnc router


Insert the bolts, and cover with a lock washer and standard nut (tighten):


Set the aluminum box tube in place, then add a standard nut and lock washer:


Add the other box section half assembly, then top with lock nuts:


Tightening the middle and top nuts took some trial-and-error.  I used ABS for the 3D printed parts, so some of the larger parts are slightly skewed/warped, so tightening was done a little at a time until all bearings were in contact with the box tube and spinning freely.  When complete, the assembly should travel freely on the box tube, and the tube should be able to be removed/re-inserted without too much hassle.

Tuesday, March 13, 2018

Building a Root 3 CNC

This post begins a series of unofficial build documentation posts for a Root 3 CNC machine.  The site for the open source/hardware project, as well as its 3D printed parts can be found at the following urls:

https://rootcnc.com/machines/root-3/
https://www.thingiverse.com/thing:1750276
https://www.facebook.com/groups/1023078667749894

Special thanks goes out to sailorpete for sharing his design.  Also special thanks to any and all who answer my rookie questions on the facebook group.

Since I have never attempted a build like this before, I plan to document the steps as I have performed them, knowing full well that some of it may not be optimal or even fully correct.  Odds are they will certainly be done in the wrong order.  Hopefully when I get to the end of this process I will have a fully functional CNC machine, and even if I don't, I suspect I will have learned quite a bit during the process.

The general principals I'll try to follow during this build include:

  • source parts from convenient vendors
    • ie, Amazon and McMaster will be heavily used for convenience, knowing full well that they may not always be the most inexpensive option.  Time is at a premium for me, so the convenience is worth the cost
  • when convenience vendors are not an option, fall back to AliExpress or eBay
  • try to use quality parts, but if I need to cut corners a bit for time's sake, I won't lose sleep over it

I started by downloading the file bundle from Thingiverse, and making a cursory pass through the BOM spreadsheet.  After that, I started diving in, printing and ordering parts as needed.

The one thing I wish I had known when I started (to make reading the official docs/plans easier)  was an axis reference.  Marking up one of the photos from the Root 3 site, I have included that below.


Due to time constraints (and long shipping delays from overseas on some of the parts), I suspect this project will take me months to complete.  Hopefully these posts will save someone else time in the future...

Tuesday, March 14, 2017

Installing Bash on Windows 10

The Windows Linux Subsystem (WSL) is now available for beta on Windows 10.  Installing it was fairly simple, and included two obligatory reboots.

Start in the Settings app, and open the "For developers settings":


Click the "Developer mode" radio button, and answer "Yes":


After a bit, a prompt will tell you its time to reboot:


After the reboot is finished, use "Programs and Features" to enable WSL:


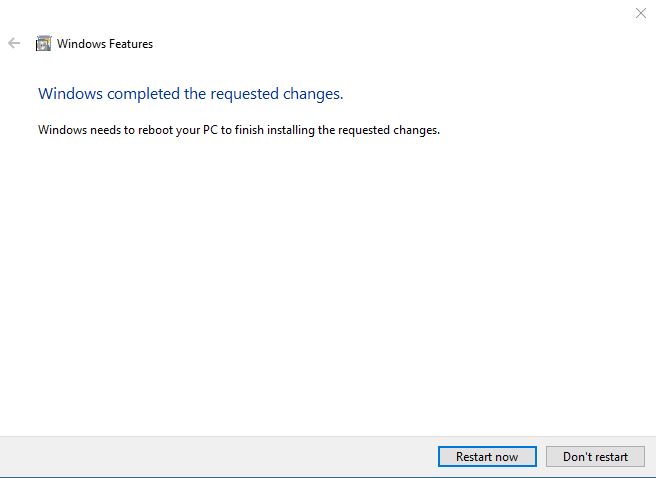
After a bit, a prompt will tell you its time to reboot (again):


After the reboot is finished, use the start menu to launch "Bash on Ubuntu on Windows" (you will be prompted to accept a license agreement and provide a username/password to create a Linux-based user account):


After a bit more grinding, the installation is complete.  Your first order of business will be to right-click | Properties for Bash and change the font to something other than the dreadful default (in my case, back to Lucida Console).


Finally, spend a few minutes to upgrade via the usual Linux commands issued in your newly installed bash console:

  • sudo apt-get update
  • sudo apt-get upgrade

Windows finally has a "real" Linux console.  Here's to hoping it makes it out of beta and gets proper care and feeding going forward...

Sunday, March 5, 2017

Cutting 2020 Aluminum Extrusion

Aluminum extrusion can used for building cages/frames for electroincs projects.  There are any number of ways to cut it (aluminum is a very soft metal), but for my money, a jigsaw with a metal cutting blade is the easiest.  The blades are inexpensive, easier to change out then a blade on a table or miter saw, and work just as well.  The material I use is:


Keeping square cuts can be a challenge, but jigs can be used to make the job easier.


Once the material is cut to length, it can be assembled with corner connectors or brackets.  The center of 2020 aluminum extrusion can be tapped to accept a 6mm screw using the materials below:


Cutting 12 sections of aluminum extrusion will allow you to assemble a cube suitable for a 3D Printer...