Friday, June 7, 2013

Driving 12V Stepper Motors

With a motor shield fully assembled (see earlier post), it was time to connect up 2 x 12V stepper motors (purchased here) and see if the soldering job was all goodness.


The motor wires were connected in the order [RED, YELLOW, GREEN, GREY]. I guessed a bit on  the location of pin one for each of the terminal blocks.  Here is the final layout:


I drove the Arduino via USB (+5V), and the motors off of a separate lab power supply (+12V):


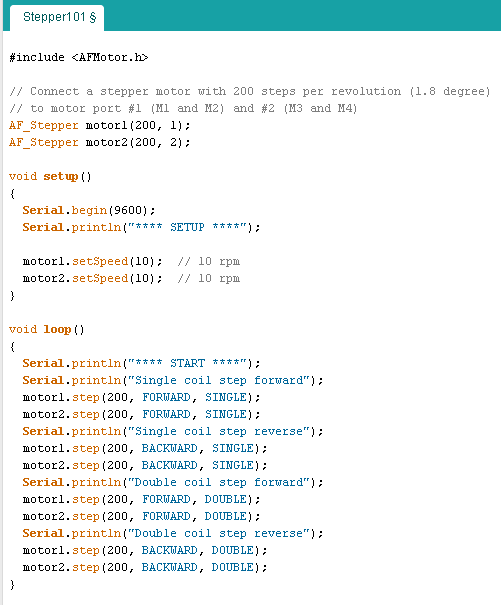
For the code, I kept the first scenario fairly simple;  Sample code from the vendor was borrowed and modified to alternate the motors, driving them both forward and reverse.  The code is below:

For this build, the impossible happened: everything worked the first time.  The next steps will involve figuring out some kind of drive mechanism to make the steppers do something productive (well, more productive then rotating two blue painters tape flags).  Since I have degrees in EE not ME, I'll need to spend a bit more time deciphering the right lingo for google queries (actuators, drive screws, linear bearings, etc., etc.)

Thursday, June 6, 2013

Assembling an Adafruit Motor Shield for Arduino

I guess my first clue should have been in the name "Adafruit Motor Shield Kit", but somehow my eyes rolled right over the last word.


The motor shield arrived as a PCB, 3 ICs, and a handful of passive components, meaning it was time to break out the soldering iron.  The kit assembled without too much trouble, with full assembly instructions online.  The online instructions appear to be for an earlier edition of the board, but it wasn't too hard to decipher the differences.

The only part of the directions that were unclear was a statement that "the four 'middle' pins of the L293D motor driver chips are tied to a large heat sink and thus may end up getting 'bridged' with solder as shown in the second image."  I wasn't sure if that meant you were supposed to bridge the pins, or it was just something that just may happen.  A little digging on the forums revealed that the pins in question are all GND, so it doesn't really matter whether they get bridged or not.

BEFORE


AFTER


I thought about showing you the outstanding soldering job on the back of the board, but decided instead to blame the camera for taking a poor picture, which has no relation to the high-quality soldering which actually occurred on this assembly.  I also installed a set of stacking headers in the extra provided through-holes, and cut them short on the back as they will not be used for stacking; since I've never worked with motors before, I'm guessing I'll have need of the convenient headers for debugging.

Next up will be the connection of the stepper motors and a sample sketch to get them moving, after of course reading the manual.

Friday, May 31, 2013

Ditching the Ubuntu Unity UI

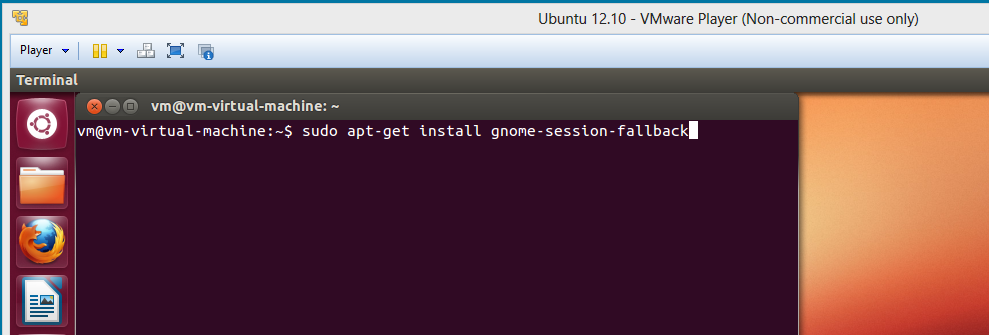
It seems to be the decade of the bad OS UI; between Windows 8 and Unity, I'm about ready to swear off UIs and stick to command prompts.  Here are some quick notes on how to get the Unity monstrosity off your Ubuntu desktop.  First open a terminal window, and run

sudo apt-get install gnome-session-fallback


After restarting the machine, click the Ubuntu logo from the login screen (on the upper right):


and you'll be greeted with another menu:


Select GNOME Classic, followed by OK.  After logging in, Ubuntu will be "back to normal".

Wednesday, May 29, 2013

Automating Tomcat 7 Installation on EC2, Part II

Finalizing the work started in Automating Tomcat 7 Installation on EC2 the user data script was enhanced to modify the following two files:
  • /etc/tomcat7/server.xml
    • change instances of 8080 to 80
    • change instances of 8443 to 443
  • /etc/default/tomcat7
    • change #AUTHBIND no to AUTHBIND yes
And then start the tomcat7 service.  The final user data script is as follows:

#!/bin/bash
export DEBIAN_FRONTEND=noninteractive
sudo apt-get update -q -y
sudo apt-get install tomcat7 tomcat7-docs tomcat7-examples -q -y
sudo sed -i 's/port="8080"/port="80"/' /etc/tomcat7/server.xml
sudo sed -i 's/redirectPort="8443"/redirectPort="443"/' /etc/tomcat7/server.xml
sudo sed -i 's/#AUTHBIND=no/AUTHBIND=yes/' /etc/default/tomcat7
sudo service tomcat7 stop
sudo service tomcat7 start

After starting a new micro Ubuntu 12 instance while providing the script above (as well as using a security configuration which allows/opens port 80 for http traffic), the web server came online and started serving up pages without any further interaction (ie - turnkey tomcat server).


The script could be enhanced further by downloading/deploying a Java webapp (exploded folder or .war file) as needed.

Tuesday, May 28, 2013

Automating Tomcat 7 Installation on EC2

Extending work performed in the earlier post Running Tomcat 7 on EC2, I began the process to automate the creation of a Tomcat 7 application server.  The magic is performed on the "Advanced Instance Options" page (which also has an equivalent in the EC2 API world):


The "User Data" area allows for the creation of a "one time script" which will be run immediately after the server is provisioned and started for the first time.  For this case, the following was dumped into a text file and included on the configuration wizard page:

 #!/bin/bash
export DEBIAN_FRONTEND=noninteractive
sudo apt-get update -q -y
sudo apt-get install tomcat7 -q -y
sudo apt-get install tomcat7-docs -q -y
sudo apt-get install tomcat7-examples -q -y

Note that the "as file" option was used as opposed to "as text".  There really is no technical reason for doing things this way;  However, this implementation does provide for a script file which could be placed under configuration management control (svn/git/etc) outside of this process.

After completing the instance wizard and waiting for provisioning, an Ubuntu 12 server was successfully created with Tomcat 7 and associated docs and examples already installed.  All that remained was the port configuration steps and service startup:

sudo nano /etc/tomcat7/server.xml
change instances of 8080 to 80, and save file
sudo nano /etc/default/tomcat7
change #AUTHBIND no to AUTHBIND yes, and save file
sudo service tomcat7 stop
sudo service tomcat7 start


In a future post, I'll attempt to integrate these remaining items into the user data script.

Thursday, May 23, 2013

Terminating Protected EC2 Instances

I'm not sure I remember selecting a protection option during creation (perhaps its a default), but while trying to terminate an old micro test box, I encountered the following:


As it turns out, this was fairly easy to resolve.  From the EC2 console window, right-click the offending instance, and choose "Change Termination Protection":


After that, just right-click the EC2 instance and select "Terminate", and it cleans up without issue.


Wednesday, May 8, 2013

Running Tomcat 7 on EC2

Installing Apache Tomcat 7 on a virtual machine within the Amazon EC2 cloud turned out to be a fairly trivial task. Using the micro instance created in a previous post, I issued the following commands on the Ubuntu command line to install the service:

sudo apt-get install update
sudo apt-get install tomcat7
sudo apt-get install tomcat7-docs
sudo apt-get install tomcat7-examples

In order to bind tomcat to listen on privileged port 80, the following steps were taken:

sudo nano /etc/tomcat7/server.xml
change instances of 8080 to 80, and save file
sudo nano /etc/default/tomcat7
change #AUTHBIND no to #AUTHBIND yes, and save file
sudo service tomcat7 stop
sudo service tomcat7 start

Finally, the Amazon EC2 security group was modified to allow access to port 80.  After these steps, bringing up a browser and accessing http://amazon-dynamic-server-name/docs successfully brought up the Tomcat 7 documentation.

I'm not sure why I was surprised, but I did discover that restarting an EC2 instance resulted in the instance obtaining a new DNS name and IP address.  The next time I work on a server, I need to remember to assign an Elastic IP address to the micro instance (in order to be able to save a PUTTY connection in my profile).