Showing posts with label Linux. Show all posts

Tuesday, March 14, 2017

Installing Bash on Windows 10

The Windows Linux Subsystem (WSL) is now available for beta on Windows 10.  Installing it was fairly simple, and included two obligatory reboots.

Start in the Settings app, and open the "For developers settings":


Click the "Developer mode" radio button, and answer "Yes":


After a bit, a prompt will tell you its time to reboot:


After the reboot is finished, use "Programs and Features" to enable WSL:


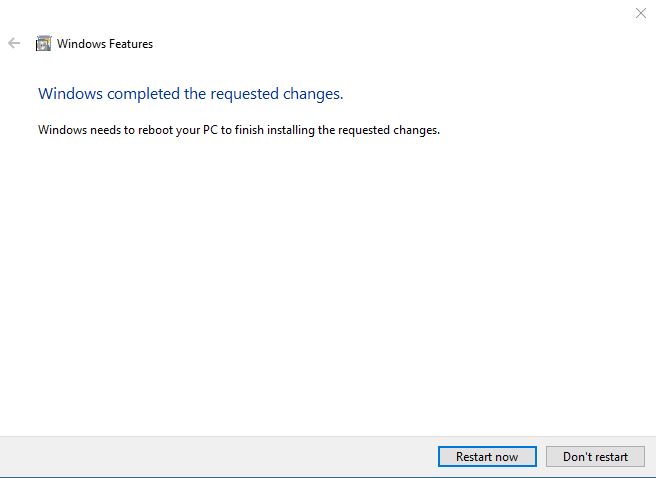
After a bit, a prompt will tell you its time to reboot (again):


After the reboot is finished, use the start menu to launch "Bash on Ubuntu on Windows" (you will be prompted to accept a license agreement and provide a username/password to create a Linux-based user account):


After a bit more grinding, the installation is complete.  Your first order of business will be to right-click | Properties for Bash and change the font to something other than the dreadful default (in my case, back to Lucida Console).


Finally, spend a few minutes to upgrade via the usual Linux commands issued in your newly installed bash console:

  • sudo apt-get update
  • sudo apt-get upgrade

Windows finally has a "real" Linux console.  Here's to hoping it makes it out of beta and gets proper care and feeding going forward...

Wednesday, January 18, 2017

Raspberry Pi 3 xdrp

The following commands will install some basic packages to allow remote logins and file sharing (thanks to source):

sudo apt install -y tightvncserver
sudo apt install -y xrdp
sudo apt install -y samba

Connect via RDP, login, and enjoy the headless pi...


Monday, January 16, 2017

Raspberry Pi 3 Setup 101

In order to support a number of upcoming projects, I've finally decided to take a step outside of the old/comfortable Arduino space, and do some work with the Pi.  The most immediate use will be to get OctoPi up and running on our new Lulzbot Mini (more on that on a future post).  But before I can do that, I need to get a Pi workspace up and running.

There are a bajillion setup guides for the Pi 3, so I will not attempt to recreate one here.  Below are my notes on the basics, so that when I forget all of this and need to do it again, I only have one place to look for my answers.

HARDWARE:


A quick trip to Amazon has everything you need: board, case/power, memory card:

Raspberry Pi 3 Model B
Smraza Starter Kit
SanDisk 32GB MicroSD card

The kit went together easy, but the screws for the case were awfully small - guess I'm showing my age, but I decided to pull out the Donegan Optivisor rather than accidentally scratch the board during assembly...


OS SETUP:


After the board was assembled, it was time for prepping the SD card.  Instructions were found at the Raspberry Pi site:

Downloading and installing the Raspberry Pi Software

I skipped the NOOBS option, and downloaded Raspbian directly, and burned it to the MicroSD card using etcher.io.  All worked as expected, and the Pi booted up without issue.

Basic Pi Configuration:


After booting for the first time, some basic house-cleaning was performed.

From a terminal window:

sudo apt-get update
sudo apt-get upgrade
sudo apt-get clean

From the Raspberry Pi configuration:


Localization:
Changed everything to US/English options, and the appropriate timezone.

System:
Changed the hostname and password, as well as choosing to expand the filesystem.

Finally the Pi was rebooted and WiFi connected via the toolbar app.  After a quick browser check to ensure everything was properly connected to the internet, victory was declared.

In a future post I'll list my notes on installation of xrdp, and getting the Pi to run in a headless manner (already tired of switching my cables, would prefer to remote into the device)...

Friday, May 31, 2013

Ditching the Ubuntu Unity UI

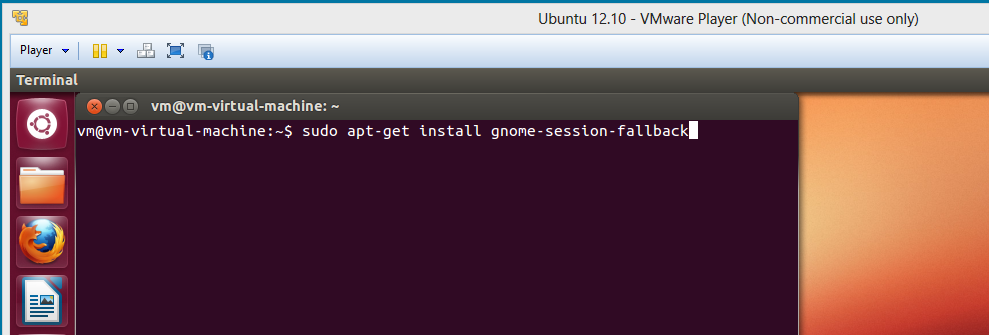
It seems to be the decade of the bad OS UI; between Windows 8 and Unity, I'm about ready to swear off UIs and stick to command prompts.  Here are some quick notes on how to get the Unity monstrosity off your Ubuntu desktop.  First open a terminal window, and run

sudo apt-get install gnome-session-fallback


After restarting the machine, click the Ubuntu logo from the login screen (on the upper right):


and you'll be greeted with another menu:


Select GNOME Classic, followed by OK.  After logging in, Ubuntu will be "back to normal".

Thursday, May 2, 2013

Launching Amazon EC2 Instances

Before continuing with development, I tested out my new Amazon AWS account by launching both a Linux and Windows micro instance.  From start to finish, each took about 10-15 minutes (including the launch wizard, waiting for the instance to spin up, logging in, and finally termination).  Amazon has instructions posted online, but the wizard is fairly idiot-proof.  The only thought process involved is in connecting to the instance, and even that has been made fairly simple.

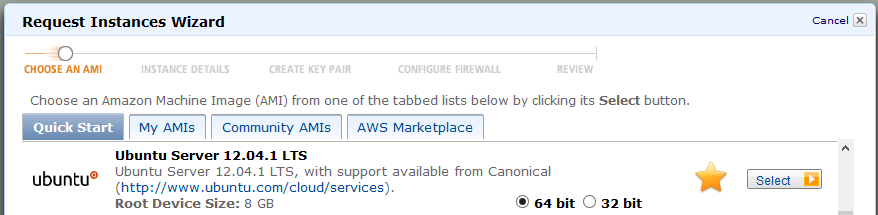
The Linux micro instance was the first to get launched.  Starting from the Amazon console, I switched into the EC2 dashboard.  It wasn't until I was over half way through the process that I realized I was defaulting to the US West (Oregon) region; I'll need to make note of that for the future (the instance responsiveness was fine even though I'm sitting on the opposite coast).  The Amazon provided documentation was adequate to get up and running.  I stepped through the New Instance wizard, and selected an Ubuntu distribution:


I accepted the defaults, with the following exceptions:


For this one I did keep the defaults, however, making a note to visit the URL above to figure out what this instance tagging is used/good for.


For the firewall configuration, I created a new rule to allow SSH only (this canned group should be ready for re-use next time).

After completing the wizard, the new Linux server started up in about 5-10 minutes:


I right-clicked the instance and attempted the Connect option.  This worked as well as could be expected for a terminal window run through a browser.  It was functional, but just no substitute for PUTTY.  The only catch to connecting through PUTTY is to remember to populate your security keys (which I had previously converted to *.ppk format) within SSH | Auth.  Once PUTTY connected, I used the username "ubuntu" and logged in without issue (or password, keys are clearly working).

Finally I exited the PUTTY session and terminated the instance.  From the same right-click menu in EC2:


choose terminate and wait until the console reflects the destruction of the instance.  I'm not entirely sure of the full scope of differences between terminate and stop, although did find this documentation that I'll need to go through at a later date.

The Windows 2008R2 micro instance performed just as smoothly.  The official amazon documentation was again comprehensive for a beginner, and the only significant difference in the startup wizard (vice Linux) was specifying 3389/RDP as the firewall configuration setting.

Logging in was indeed different, using Remote Desktop vice PUTTY.  The process begins with right-clicking the instance and retrieving the password:


and then decrypting the password with the *.pem key pair.  With an administrator username and password now in hand, I logged in using the standard Remote Desktop Connection tool which ships with Windows 8.  I completed this test by terminating the Windows instance.

I did not perform a shutdown from within Windows before terminating (because as I understand it, terminating effectively destroys the instance, so who cares if it shuts down cleanly), but will need to revisit that in the future as instances are created that I care about.

As a final step, I used the Amazon console and jumped to the Account Activity report, just to verify that all the compute time was included in the free trial (and I didn't launch the wrong instances).


Overall, things could not have been easier.  Now all I need to do is come up with a sample application to build and deploy, just to exercise the environment a little more thoroughly.