I decided to finally upgrade the old home-made switching power supply I've been using for the last 20 years (at some point it becomes more of a fire hazard then a power supply). Luckily components are a little more readily available these days, and I chose the Riden RD6006 controller. You can find the components more reasonably priced here (if you can wait a month for shipping):
RD Riden Factory Store
or pickup the components on Amazon (a fairly steep markup, but it will be at your house tomorrow):
RD6006 Controller
60V Power Supply
Case
CR1220 Battery
PC Power Cord
After unboxing and testing the power supply with a test cable, the power supply was ready to assemble:
First install the switch, power terminal, and case fan:
Mount the power supply:
Add the case feet (so the supply screws don't scratch up your desktop):
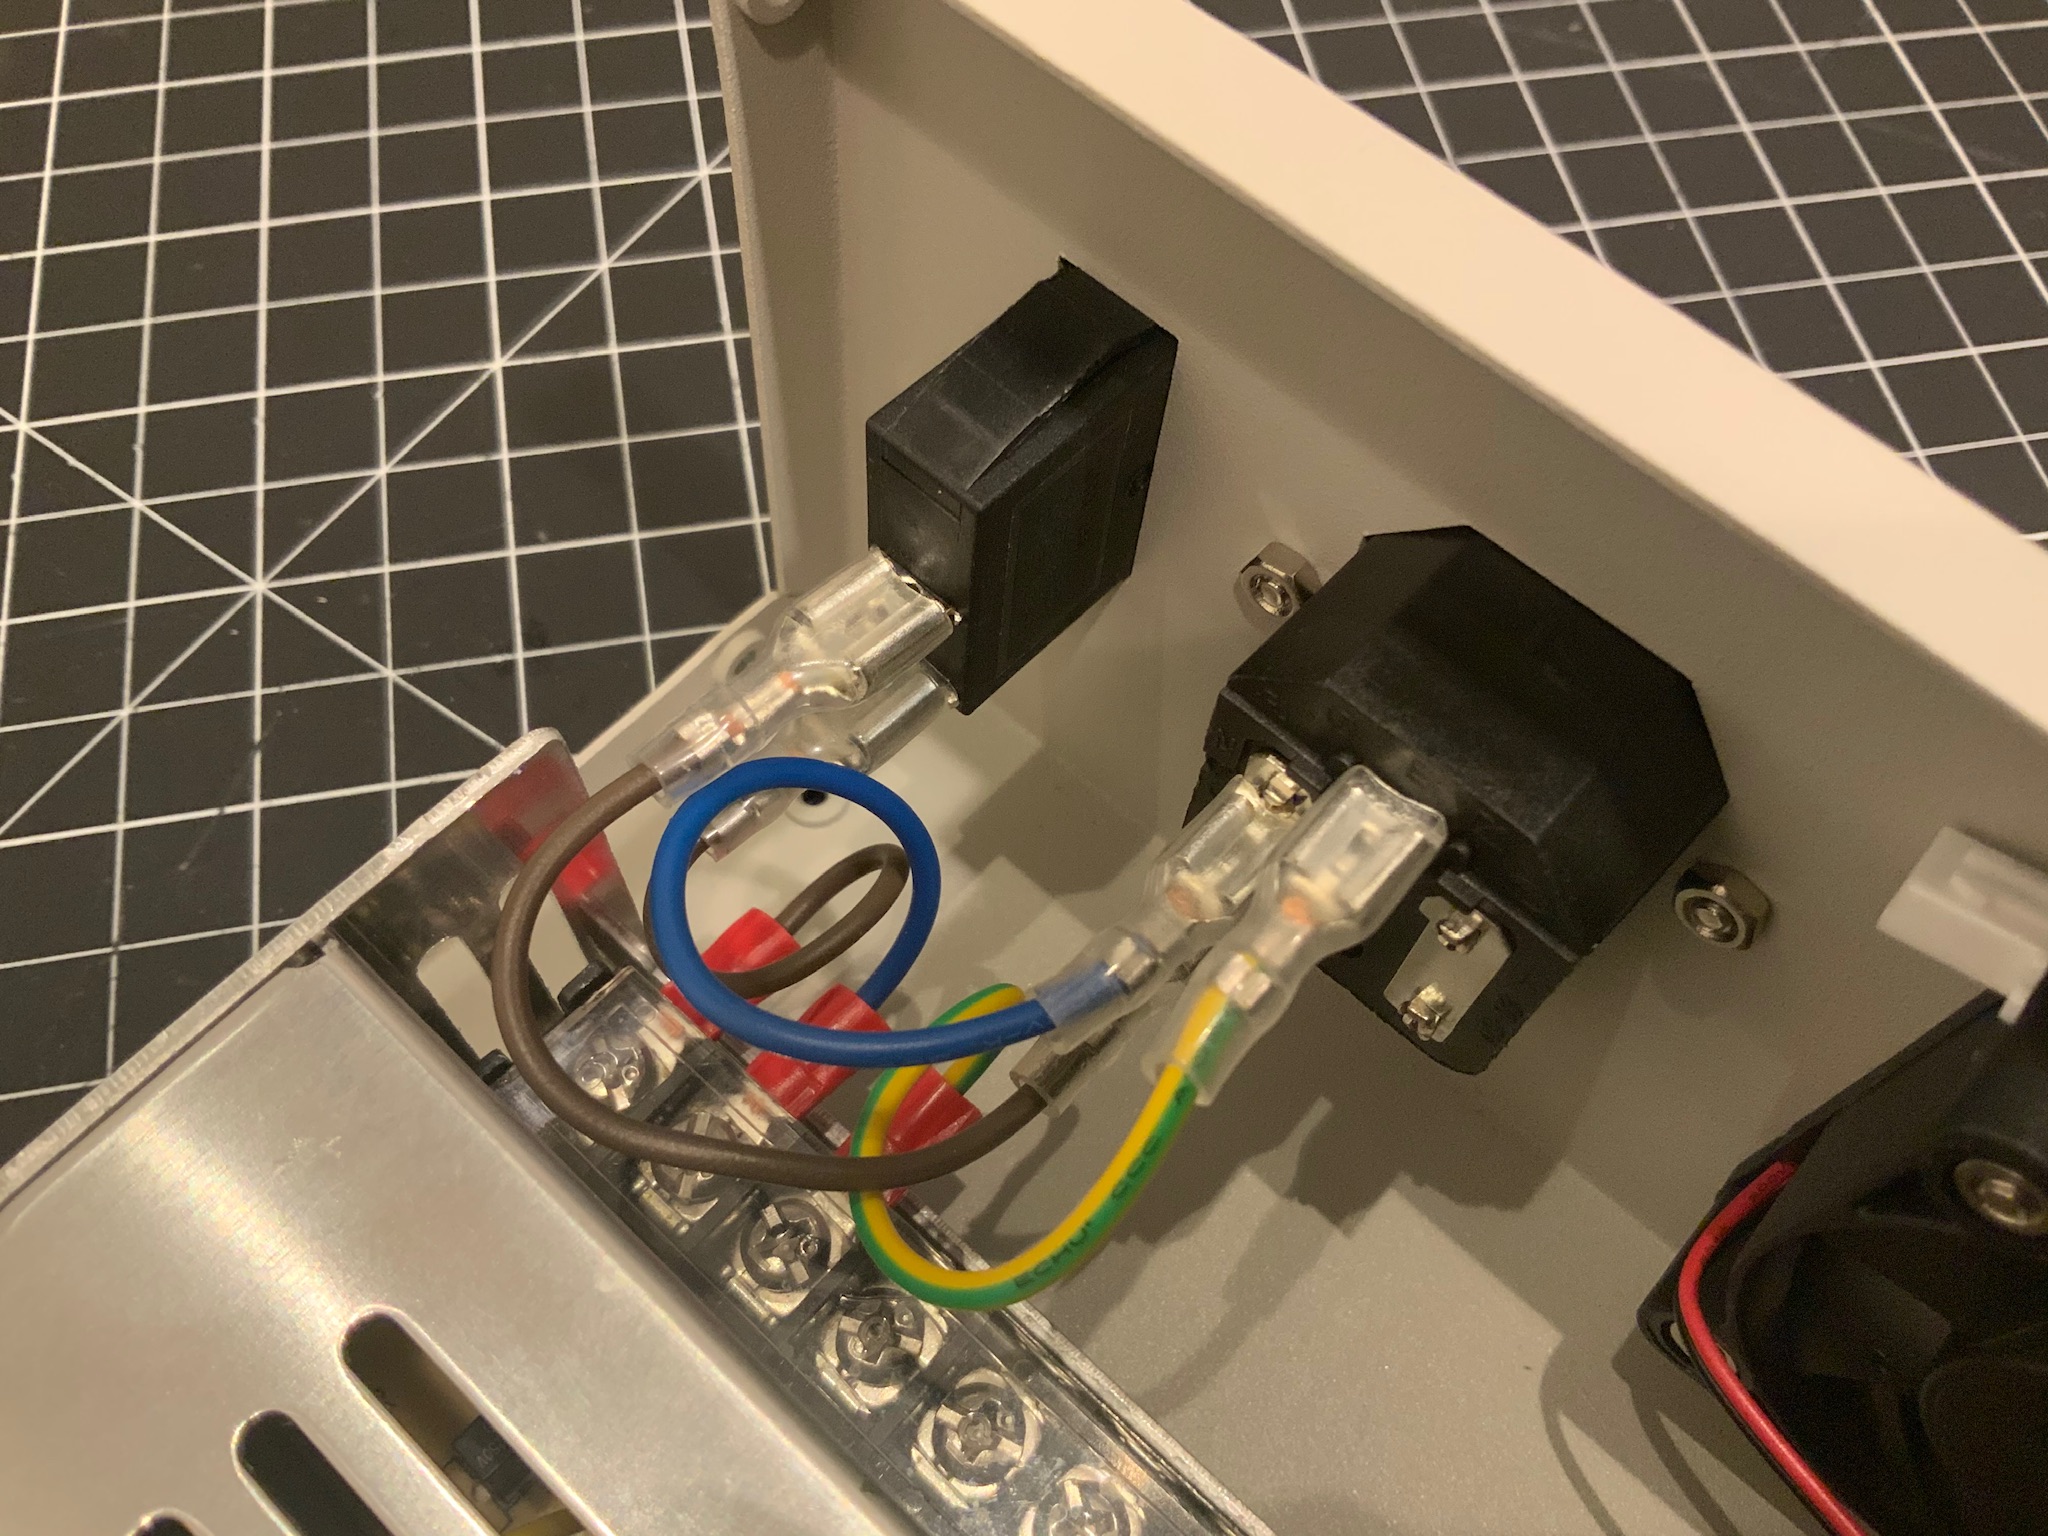
Wiring took a little bit to figure out; the marking is camouflaged fairly well, but if you look closely you can see an E (for earth ground) and N for neutral (leaving the last terminal being hot):
The jumper cables from the kit were sized correctly:
Next install the case fan temperature controller:
And wire directly to the supply:
The power terminal was pulled from the controller and wires added from the case kit:
Power cable connected to the controller (making sure to honor polarity on the PCB):
Add a CR1220 battery as the mount is beneath the WIFI module:
Install the WIFI module:
Add the controller temperature probe:
Before closing up the case, power it up and make sure all is well:
A project is never done until the wire wraps go on...
Fully assemble the case:
Note that I had a bit of trouble getting all the parts together - the controller JUST fits within the case, and the case is not 100% square, so there was one case screw I just could not get aligned. All that being said, I'm fairly pleased with the result.
The manual can be found here from the vendor:
And this video was also useful:


No comments:
Post a Comment